STEP 01 / ADD SERVER
Add a server or import an existing subscription
First identify the information you have: details with fields such as Host, Port, and Password describe an individual server; a link that can update a group of servers is a subscription link. The two cannot be distinguished by link length alone. Do not use a provider's login page URL as a subscription link. Check the configuration instructions from your existing provider to confirm the import type, then continue in Shadowrocket.
Individual server: check Type and the fields
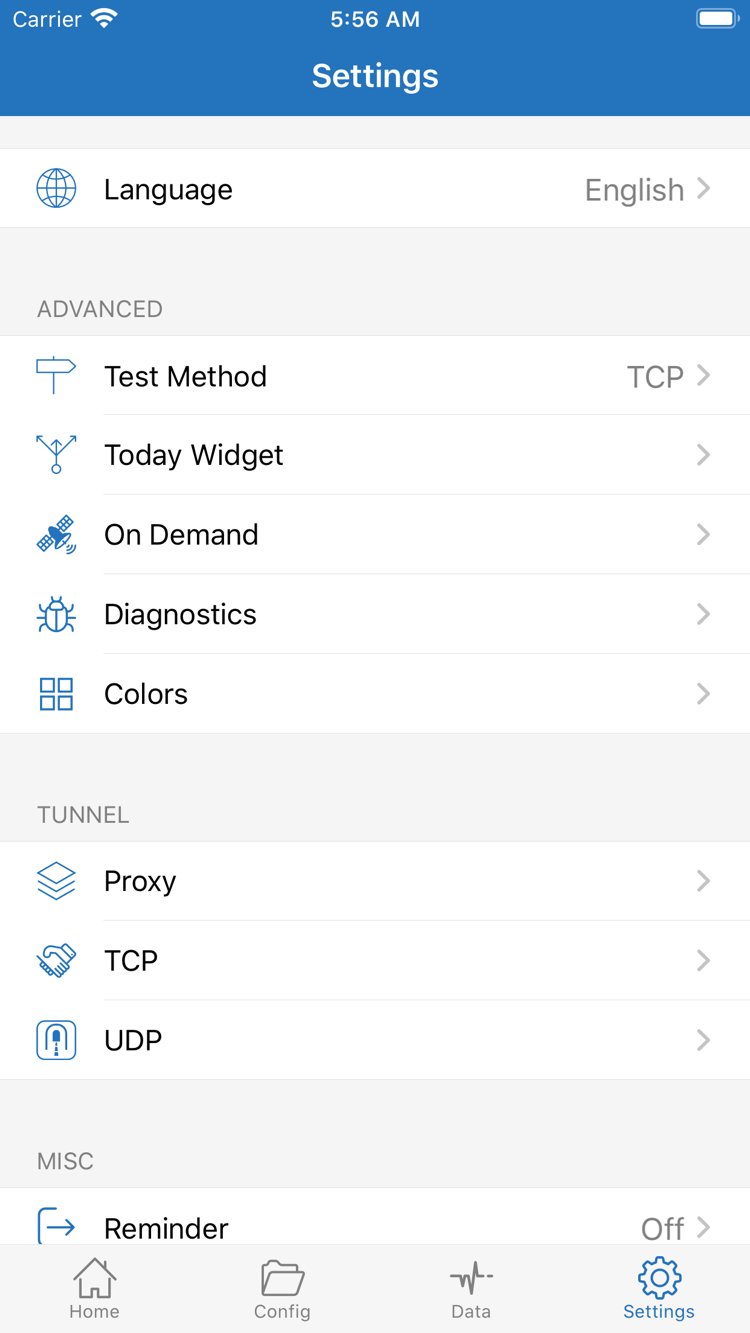
Open Home and tap the add control in the top-right corner or Add Server in the list. Tap Type and select the protocol that matches your existing server, then fill in Host, Port, and any required authentication fields. The official screenshot on the right shows a form with Password and Method. Fields vary with the selected Type, so do not change the protocol just to match the screenshot.
Host is usually just the server domain or IP address, without a webpage path; enter the port number provided by your provider. Match the capitalization of the password, Method, and any protocol-specific parameters such as TLS or the server name. If a field was not provided, check the provider's instructions rather than guessing based on someone else's configuration. Save or finish on the page, return to Home, and check that the new item appears in the SERVER group.
Subscription: select Subscribe, then save
If you have a subscription link, select Subscribe under Type in Add Server, paste the complete address into the URL field, and save it. Include every parameter at the end of the address when copying. Remove leading or trailing spaces and accidental line breaks, but do not delete anything after the question mark. A subscription link may contain credentials, so do not include the full address in public screenshots or troubleshooting records.
After saving, return to Home and wait for the subscription content to load. To refresh it, use the update action on that subscription item. Confirm that servers appear under the subscription group, rather than just a saved group name. If the list is still empty, check the address under Common issues first. Repeatedly toggling the connection switch will not help: you cannot select a server if the list contains none.
If an existing configuration is provided as a QR code, use Scan QR Code in Add Server, allow camera access when prompted, and review the recognized content before saving. Import from Cloud JSON is for configurations in the corresponding format; it is not a general-purpose way to import any subscription link. When finished, select an item and continue to the Global Routing settings.
STEP 02 / GLOBAL ROUTING
Choose a Global Routing mode
The server determines where the connection goes; Global Routing determines how requests are handled. Check both separately. Return to Home, tap Global Routing, and review the current selection. The three modes are Config / Proxy / Direct. This selects a routing method, not a server connectivity test, and choosing a mode will not automatically fix server parameters.
Config: use the current rules
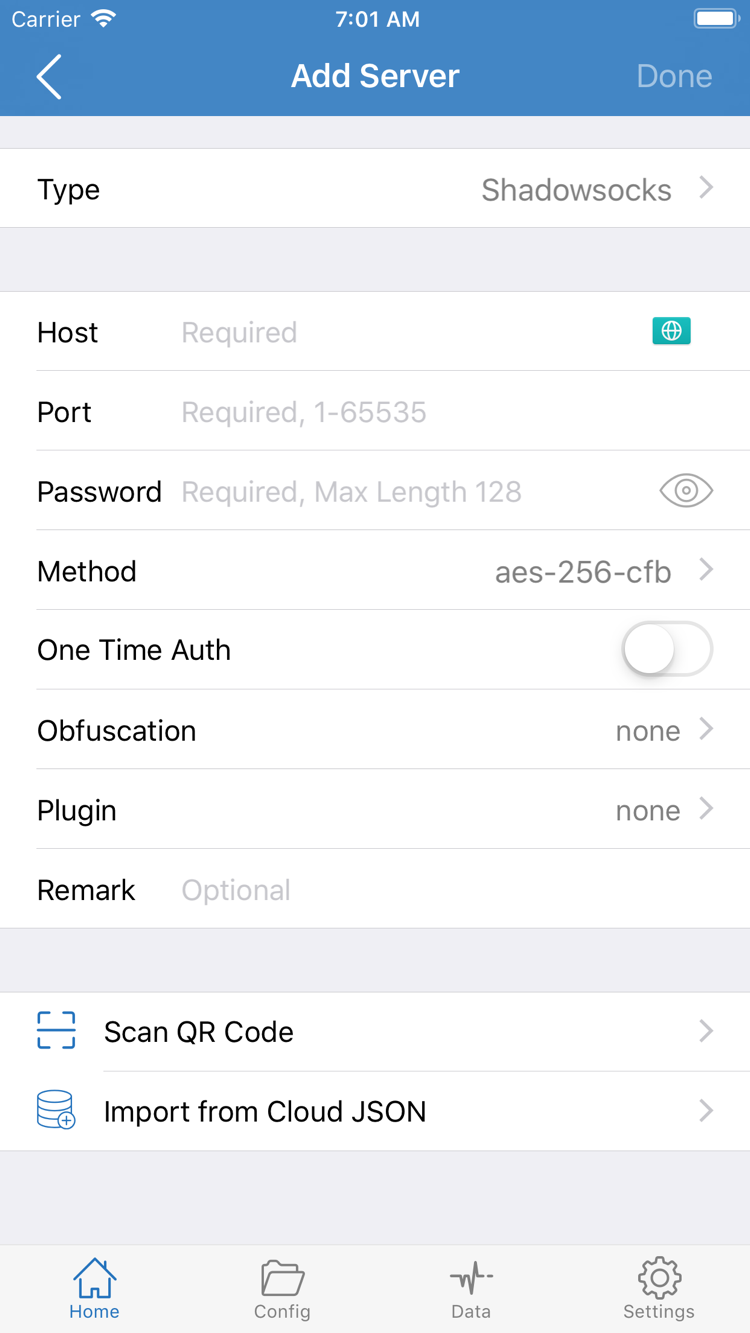
Choose Config for everyday rule-based routing. The app handles requests according to the rules in the current configuration. In those rules, PROXY, DIRECT, and REJECT specify the corresponding proxy, direct, and reject actions. Open Config at the bottom and confirm which configuration file is currently selected. The file contains sections such as General, Rule, and Hosts, as shown in the official screenshot. Importing a subscription mainly updates server entries; it does not necessarily switch the configuration file selected here.
If your provider supplies a complete configuration for your use case, check and select it as instructed. Before the first connection, avoid changing DNS, Rule, and other advanced settings at the same time. Specific rules in a configuration generally go before fallback rules. The snippet below only illustrates matching order; it is not a complete configuration to paste as a whole.
DOMAIN-SUFFIX,example.com,PROXY
IP-CIDR,192.168.0.0/16,DIRECT
FINAL,PROXY
Proxy and Direct: compare routing paths
Proxy routes requests normally handled by this mode through the selected proxy, which can help determine whether a problem is related to Config rules. Direct uses the direct path and can help you compare with the local network. Neither is a permanently “faster” option; results also depend on the destination service, server status, and current network. A page opening in Direct does not mean the proxy server is working.
This guide recommends keeping a clearly identified existing configuration and starting with Config for everyday use. If you later need to compare Proxy with Config, change only this setting and repeat the same test, then restore the original mode. See the troubleshooting guide for an in-depth look at rule matching, FINAL, and DNS. Now return to Home to select a server and connect.
STEP 03 / CONNECT
Select an item and turn on the connection
Return to Home and select the server you want to use in the SERVER group. Check that the selection indicator is on the intended item. A subscription may contain several servers, so check the selected item again after adding or updating it. For the first test, select just one. Switching between several items during testing makes it difficult to tell whether a change in results came from the server or a setting.
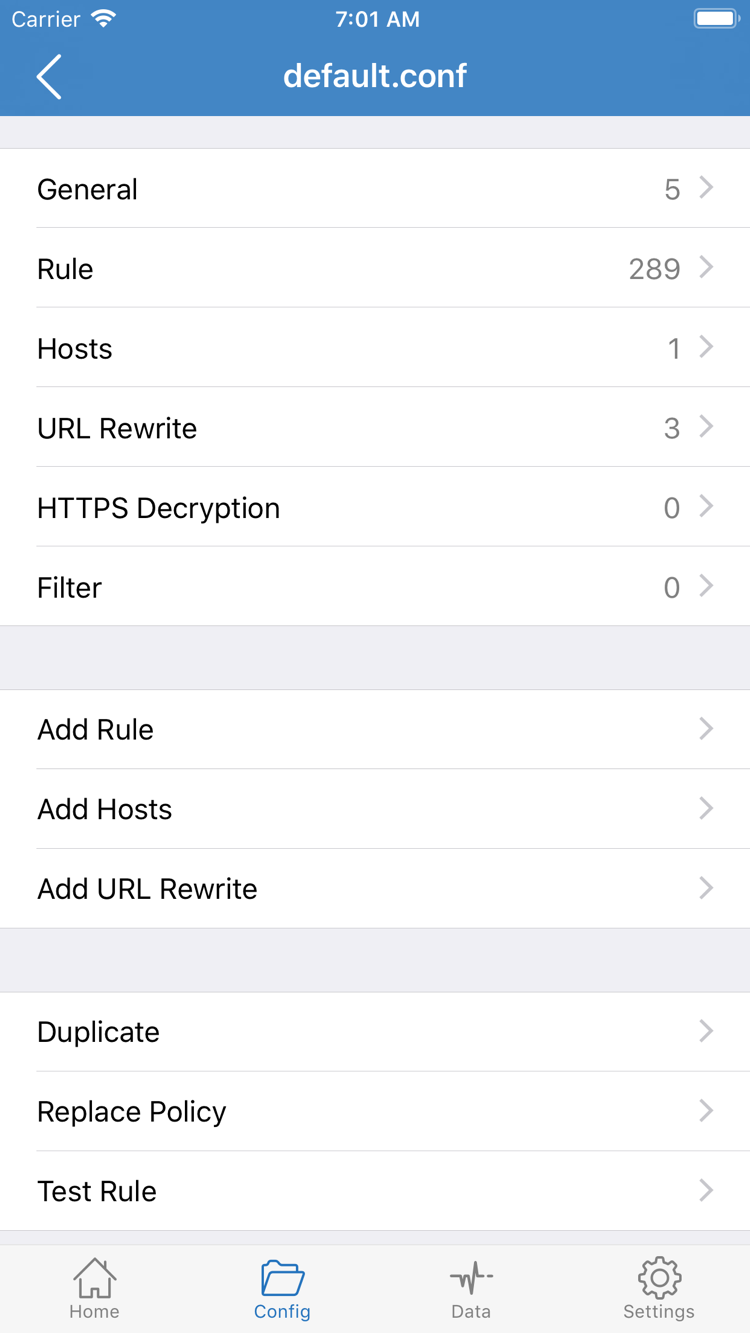
Confirm that Global Routing is set to the mode you just chose, then turn on the connection switch at the top of Home. The official screenshot shows the Not Connected state before connecting. The first time you connect, the system may ask permission to add a VPN configuration. Check that the requesting app is Shadowrocket, then confirm as prompted by the system. If required, complete authorization with your device passcode or system authentication. If you deny permission, the app cannot establish a system connection using that configuration.
After authorization, return to Home and check whether the switch and connection status remain on. The VPN indicator in the system status area can help confirm the system connection, but its appearance varies by device, display area, and system version. Do not judge the path of all requests solely by whether an icon appears in one place. An enabled VPN configuration does not guarantee that the remote server is reachable, so verify it in practice next.
If the switch turns off immediately after you turn it on, note whether a system prompt appeared. Check whether the current configuration is present in the system VPN settings and whether another VPN connection is in use. Do not repeatedly retry authorization or immediately delete all configurations. Organization-managed devices may restrict VPN configurations; follow the device management requirements rather than attempting to bypass them.
For the first test, keep the network unchanged. Do not switch between Wi-Fi and cellular data while connecting, and leave On Demand unchanged for now. To stop the connection, turn off the switch on Home. If it later reconnects unexpectedly, check the On Demand conditions in Settings. Keep the baseline consistent—same network, same item, same mode—so the next checks can be compared.
STEP 04 / VERIFY
Verify the connection and rules
Tap Connectivity Test on Home, wait for it to finish, and review the result for the selected server. A failure or timeout means the expected communication was not completed by this test; first check the network and server. A result means the test method received a response. It does not mean that every website, protocol, or app request will work, nor does it prove that every Config rule matched as expected.
Verify with an actual request
Keep the connection on and use a browser to visit a familiar page with clear content, then check the specific destination you need. Prefer a newly opened page to avoid mistaking cached content for a successful new request. If only one app has a problem, compare its result with the browser before attributing the issue to the entire connection. The app's own sign-in state or a remote service outage may also affect what you see.
To check routing, review the available connection or diagnostic records in the app and compare the destination domain, matched rule, and action. Changes in traffic under Data can help indicate that requests passed through the app, but an increase in traffic does not mean that the destination used PROXY; check the actual action as well. If local network traffic uses DIRECT according to the rules, a direct result is not itself an error.
Compare one variable at a time
If a destination works in Proxy but fails in Config, keep the server unchanged and check the current Config rules and DNS first. If both fail, review the server parameters, service status, and current network first. If ordinary pages also fail in Direct, restore the local network before testing the proxy again. Use comparisons to narrow down the cause, not to assume that a particular setting must be wrong.
Record the network type, displayed server name, Global Routing mode, and specific failure symptoms. Do not record the full subscription link, password, or authentication parameters. Once familiar pages and the expected routing work, restore everyday settings such as On Demand one at a time, retesting after each change to identify any effect.
STEP 05 / SETTINGS
Check common issues based on symptoms
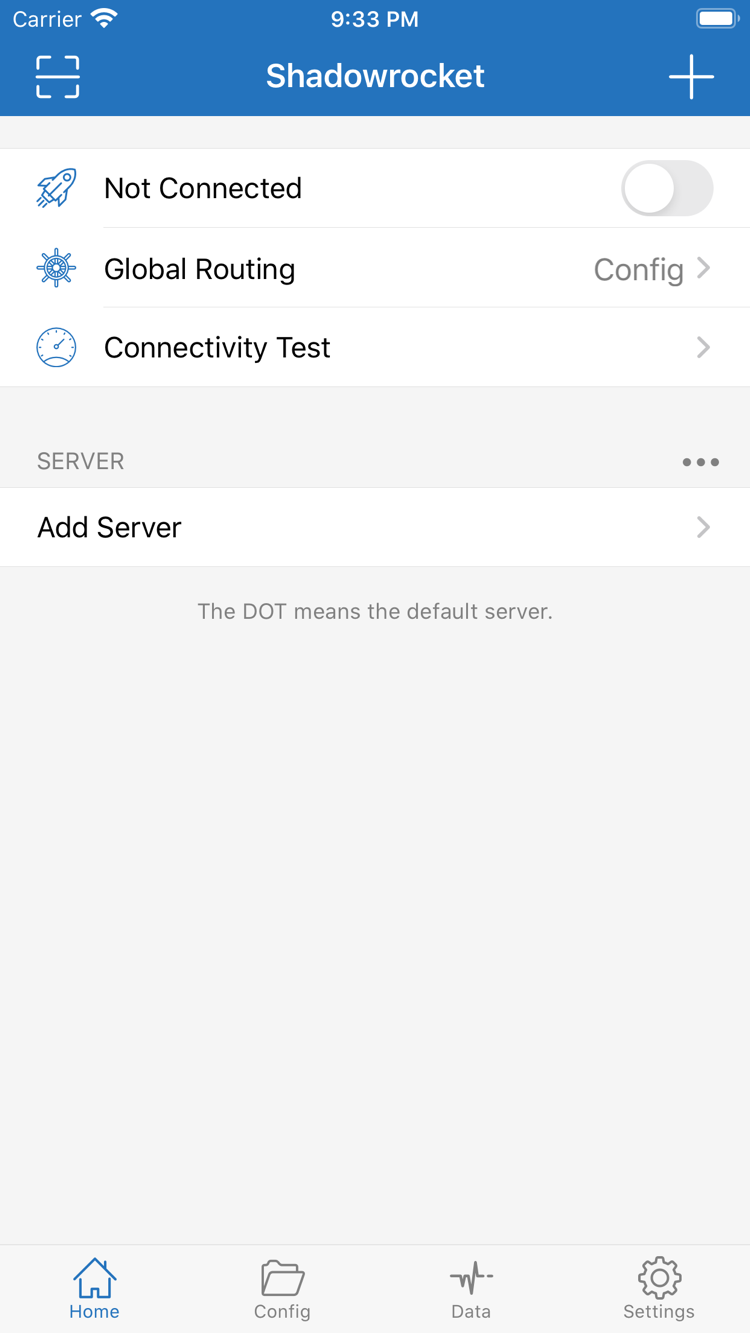
Troubleshoot in this order: check the local network, then imported content and the server, and finally rules and additional settings. Change one item at a time and repeat the same real request. In Settings, you can find options such as Test Method, On Demand, and Diagnostics, as shown in the official screenshot. Do not reset Proxy, TCP, UDP, and other settings all at once after a failed test; that removes the baseline you need for comparison.
Subscription saved, but the list is empty
Return to the subscription settings and check that Type is Subscribe, the link is complete, and no extra spaces were added. Confirm that the address is still valid and returns a subscription the app can recognize, rather than a login page or error message. Avoid repeated updates over a short period. If the provider limits update frequency, wait as instructed. For questions about address validity, permissions, or content, check with your existing provider. Do not share the full subscription link.
Server appears, but Connectivity Test times out
Confirm that an ordinary page opens over a direct connection, then check the selected server's Host, Port, and authentication details. For a subscription item, update it once; for a manually added server, compare each field with the original details. Test Method in Settings affects test behavior and the ability to compare results, so keep it consistent when comparing servers. If a test method receives no response, also check actual browser access; a single test value does not represent the overall status of the connection.
Switch stays on, but some pages will not open
First confirm that the current mode is not Direct, then compare Proxy and Config as described above. If only Config fails, check whether the wrong configuration file is selected and whether the destination domain matches a REJECT rule or an unsuitable DIRECT rule. If domain resolution fails, check DNS rather than only changing the order of rules. Do not enable or modify HTTPS Decryption or URL Rewrite to fix an ordinary connection problem; neither is required for the first connection.
Switch keeps changing, or issues start after changing networks
Check system VPN permissions and whether another connection is in use, then review automatic connection conditions under On Demand in Settings. If the issue occurs only on Wi-Fi or only on cellular data, record the results separately and avoid changing the server and network at the same time. Follow the same checks on iPad. The layout may shift in landscape orientation, but the Home, Config, and Settings entry names remain the same.
For further analysis, check the available records in Diagnostics. Before sharing records, remove credentials from subscription links, server authentication details, and other personal data. Keep only the symptoms, conditions, and steps already tried. For systematic checks of DNS, battery use, issues after an update, and iPad-specific steps, see Shadowrocket Troubleshooting. If you only need a reminder of the first-time setup order, return to Add and import and check each step without clearing all settings first.